This guide frames Image Labeling Project Plan: Connect Collection, Annotation, QA, and Training as a dataset-quality workflow rather than a labeling-speed trick. Easy Labeling can make the work faster, but trainable data still depends on class rules and review routines.
An image labeling project should start before the labeling screen, with objective, collection, instructions, QA, and training feedback designed as one loop.
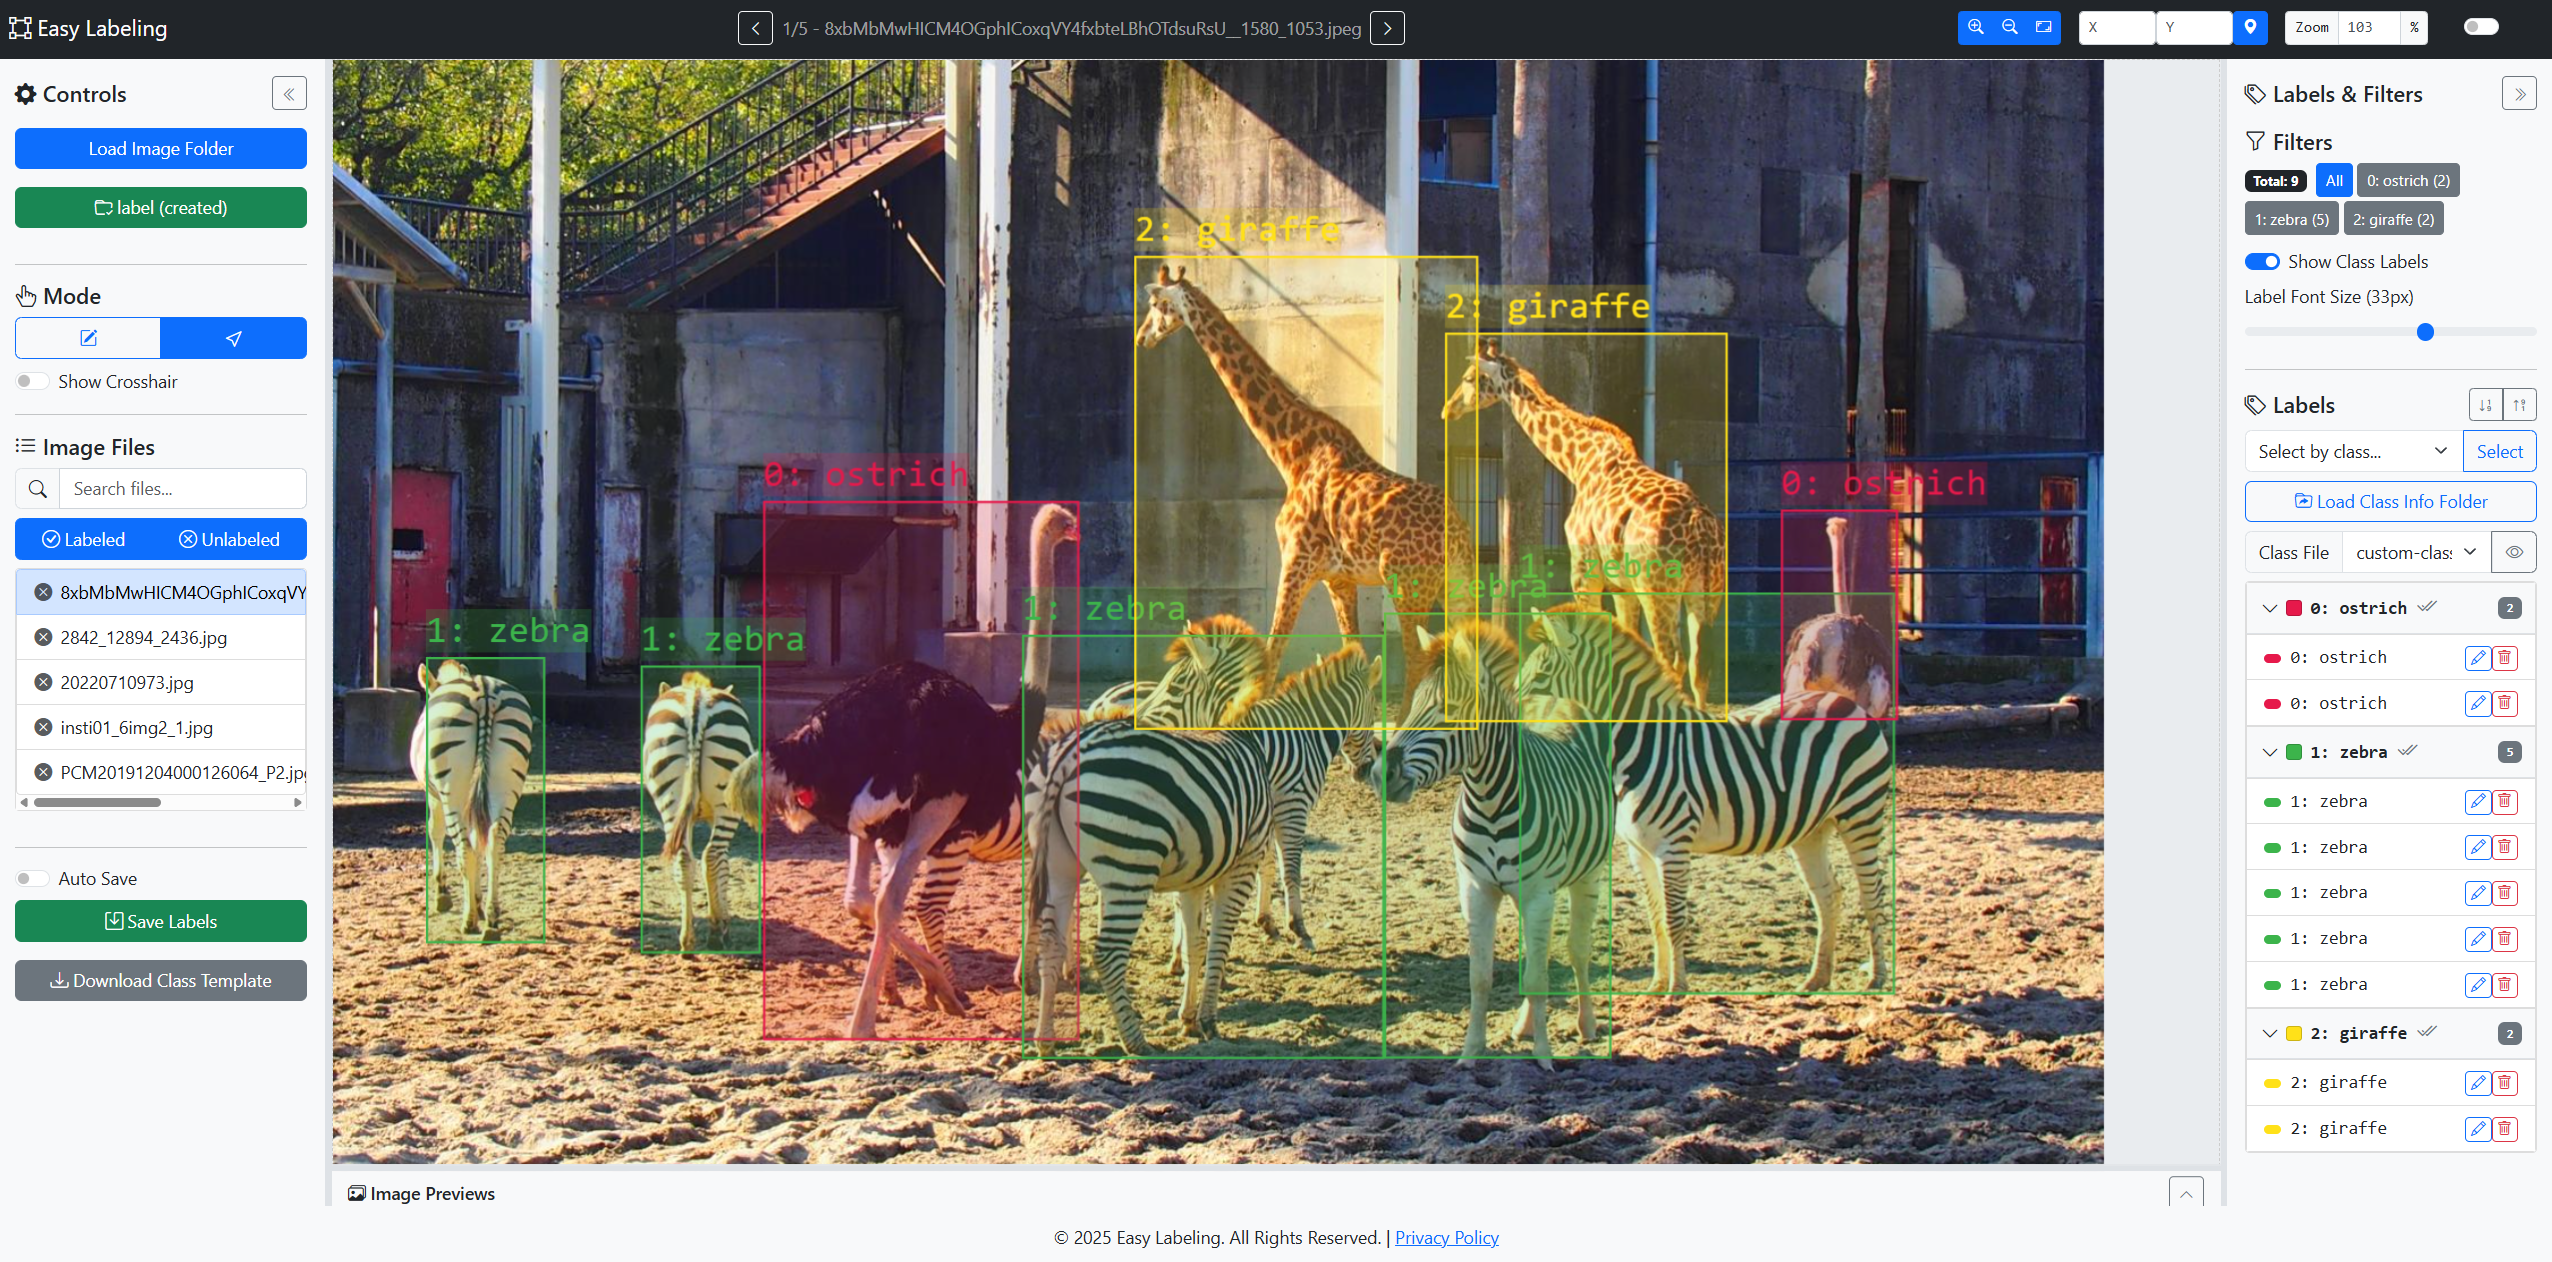
Launch the tool: Easy Labeling
What This Work Reduces
Before choosing a tool, define which model failure the dataset is meant to reduce.
This topic is less about drawing more boxes and more about preserving project objective and pilot batch consistently. In object detection, small coordinate errors, class-order changes, and folder mistakes can look like model failures. That is why tool usage and the dataset contract should be documented together.
Quality Signals To Check First
- project objective: Freeze the rule before labeling starts. Include positive examples, exclusion rules, and edge cases so two labelers can make the same decision on the same image.
- pilot batch: Check it in a pilot batch first. Before opening the full dataset, use 20 to 50 samples to verify coordinates, classes, and save paths against the training folder.
- qa gate: Capture ambiguous cases in a question log or edge-case gallery. When the same question repeats, update the instruction version instead of relying on individual judgment.
- feedback loop: Package it with the QA record before handoff. Images, labels, class files, conversion scripts, and reviewed samples should point to the same dataset version.
Easy Labeling Workflow
Start with a small pilot batch. First, write target objects and excluded objects first. Then, use a small pilot batch to validate standards and time estimates. Opening 20 to 50 sample images in Easy Labeling quickly exposes missing rules in the instruction document. Questions from this step should update the class dictionary or edge-case gallery rather than disappear in chat.
Easy Labeling fits a local-first image annotation workflow. In the current repository, Detection handles YOLO bounding boxes and Segmentation handles brush-based masks, so choose the tab according to the dataset contract before labeling starts. The tool does not replace project standards, so the instruction document before labeling and the QA routine after labeling still matter.
Repository-Checked Tool Scope
Current Easy Labeling is not only a YOLO box editor. The repository README documents two workflow tabs: Detection for YOLO bounding boxes and Segmentation for brush-based masks. Detection saves label/<image>.txt in YOLO format. Segmentation saves mask/<image>.png and mask/<image>.seg.json.
Use Desktop Chrome or Edge for the browser version because local folder read/write depends on the File System Access API. The repository also documents an Electron Windows build for teams that prefer an installed local app. Detection list actions such as multi-edit, alignment, distribution, copy, and paste should be treated as Detection-focused features, while Segmentation editing is brush, eraser, connected-region selection, drag, and class-change work.
Review Example
Reviewers do not need to relabel every image. Open samples and check whether project objective follows the rule, then confirm that qa gate matches the project standard. If the issue repeats, inspect the instruction document, example images, and save settings before blaming an individual labeler.
Practical Checklist
- Before labeling, confirm the project objective rule in the instruction document.
- After saving, spot-check that pilot batch appears correctly in label files.
- Turn questions from labeling into instruction updates before the next batch.
- Before handoff, package images, labels, class files, and QA notes as one version.
FAQ
Does Image Labeling Project Plan: Connect Collection, Annotation, QA, and Training become easy just by using Easy Labeling?
No. Easy Labeling can speed up local Detection box work and also provides a Segmentation mask workflow, but the project must still define the project objective rule. The tool and instruction document need to work together.
Do small datasets need this much QA?
Yes. In a small dataset, one or two mistakes can move results visibly. At minimum, spot-check pilot batch and class order before handing data to training.
When should labels be redone?
Relabel when the same error type repeats across images or model analysis shows a class keeps drifting. Fix the instruction document first, then review the batch under the updated rule.
Professional Depth Check
For Image Labeling Project Plan: Connect Collection, Annotation, QA, and Training, the practical standard is not whether the reader can repeat one instruction once. Treat the topic as a computer-vision dataset quality workflow: verify class dictionary, annotation consistency, train/validation/test split, and export format before drawing a conclusion. The result should be written as a small decision record, because future readers need to know which fact was observed, which assumption was used, and which condition would change the answer.
Source Notes
- Easy Labeling GitHub Repository: current tool scope, Detection/Segmentation workflows, save formats, browser requirements, and Electron build notes.
- FiftyOne Annotation Guide
- Label Studio Bounding Box Template
- Ultralytics Object Detection Dataset Docs


Leave a comment